
Designing a professional book cover doesn’t have to be complicated at all. With Canva and the right template from Bookadew, you can create a perfectly fitting design in just a few steps. In this blog, we explain step-by-step how to do this, from calculating the spine thickness to exporting your print-ready PDF. Let’s go!
Please note: in this blog, we are looking at a hardcover book!
Step 1. Calculate the ridge thickness
Before you start designing, it is important to know how thick your book is. The spine thickness determines the total width of your cover. You calculate this in the Bookadew price calculator based on your desired specifications.
- Go to staging.bookadew.com/bestellen/
- Make the choices for your book!
- Book type: hardcover
- Format: for example square 210 x 210 mm or A5 portrait
- Number of pages: how many pages will be in your book (always a multiple of 4)
- And all other options such as paper type, laminate, etc.
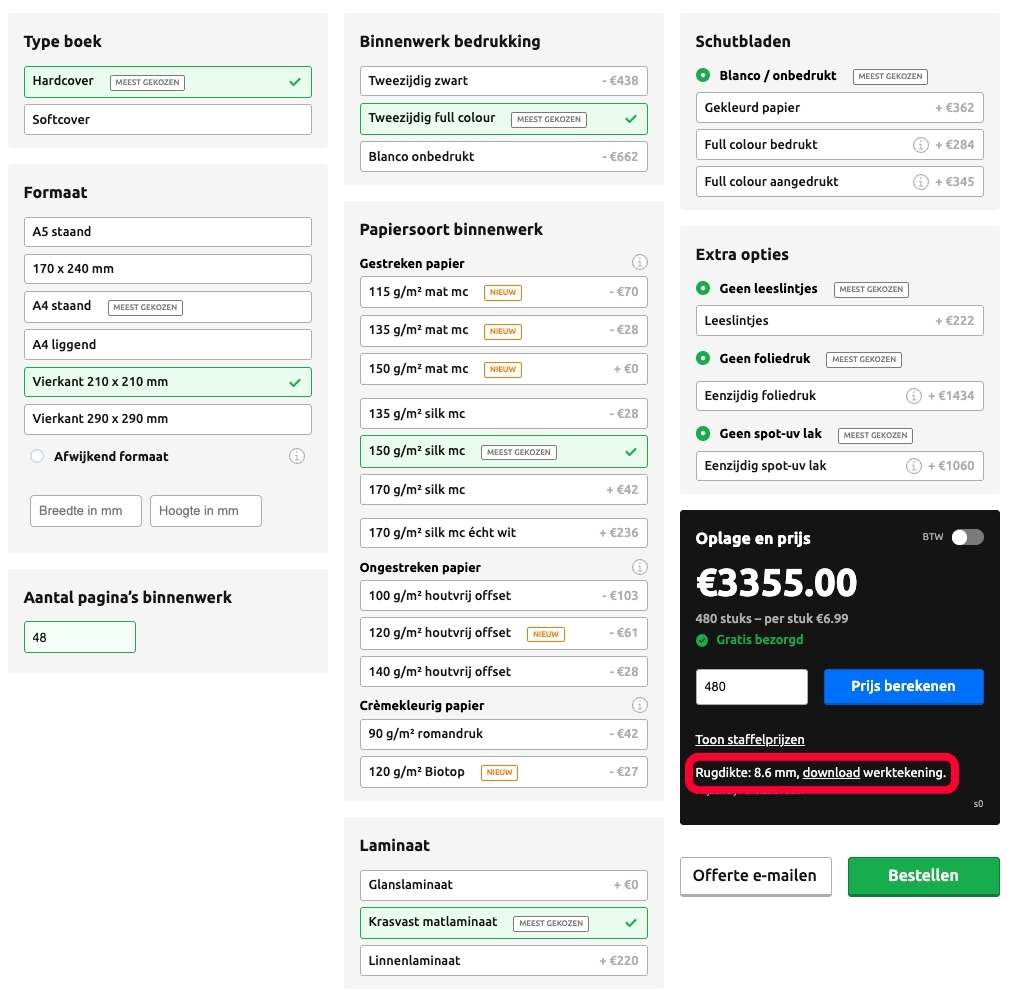
- As soon as you have entered your settings and click on “calculate price”, the spine thickness automatically appears at the bottom in the black area. (In our example, this is 8.6 mm, see image).
- Click directly on “Download working drawing”. This is the technical drawing that shows the total size your cover needs to be. You will need this information for the following steps.
Image 1: Bookadew price calculator with correct spine thickness
Step 2. View the working drawing
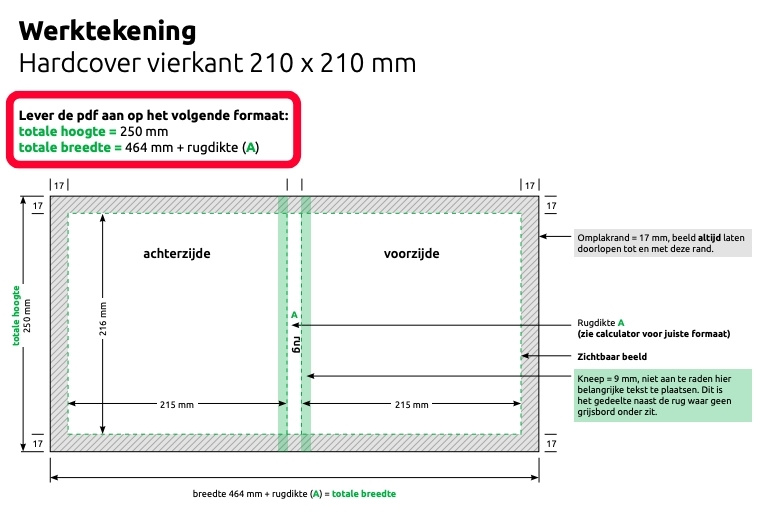
The working drawing is your guide. On it, you can see exactly how the cover is constructed:
- Front
- Spine
- Backside
- And the adhesive edge (17mm)
Example
For a hardcover book of 210 x 210 mm with a spine of 8.6 mm, the working drawing indicates:
- Total height: 250 mm
- Total width: 464 mm + spine thickness (8.6 mm) = 472.6 mm
So you immediately see what your total Canva size should be. In this example: 472.6 mm wide x 250 mm high.
Please note: The inner green dotted lines indicate where the visible image will be placed. The 17 mm grey border is the wrapping edge; always extend your background or image to the outer edge to prevent white borders. This border will ultimately be folded around the cover and will therefore partially disappear visually.
Figure 2: working drawing Bookadew hardcover square 210×210 mm
Step 3. Assemble your document in Canva
- Go to www.canva.com or open the Canva app (free to download for iOS and Android)
- Create a ‘new design’.
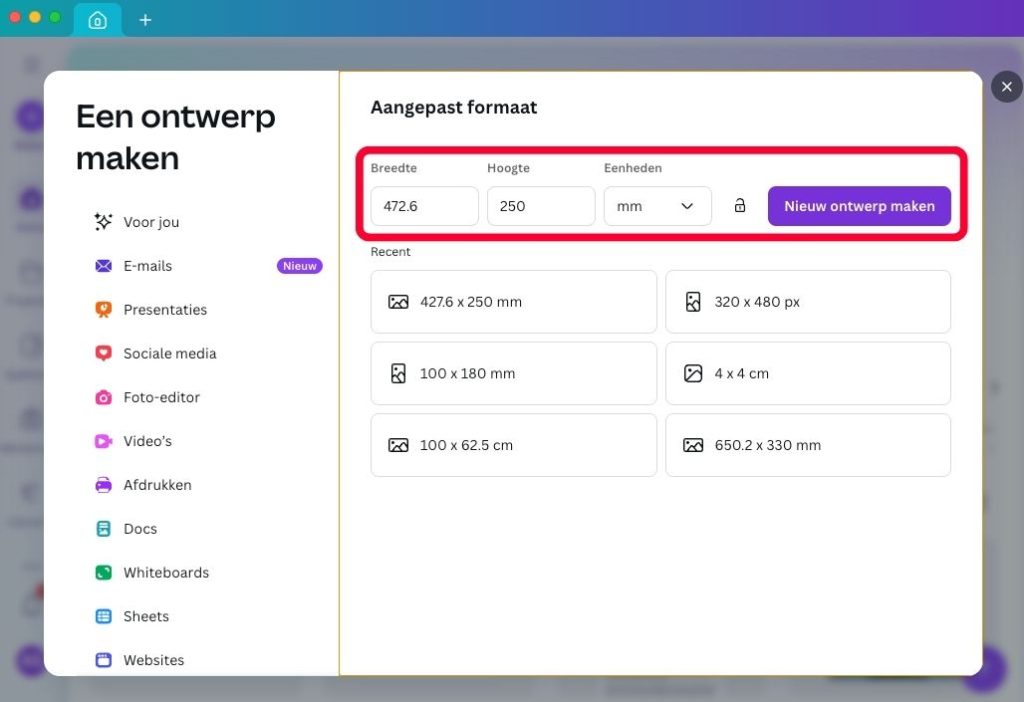
- Click on ‘custom dimensions’
- Enter the dimensions listed in your working drawing (such as 472.6 mm x 250 mm in our example). Please note: select the unit Millimeters.
- Click on ‘create new design’
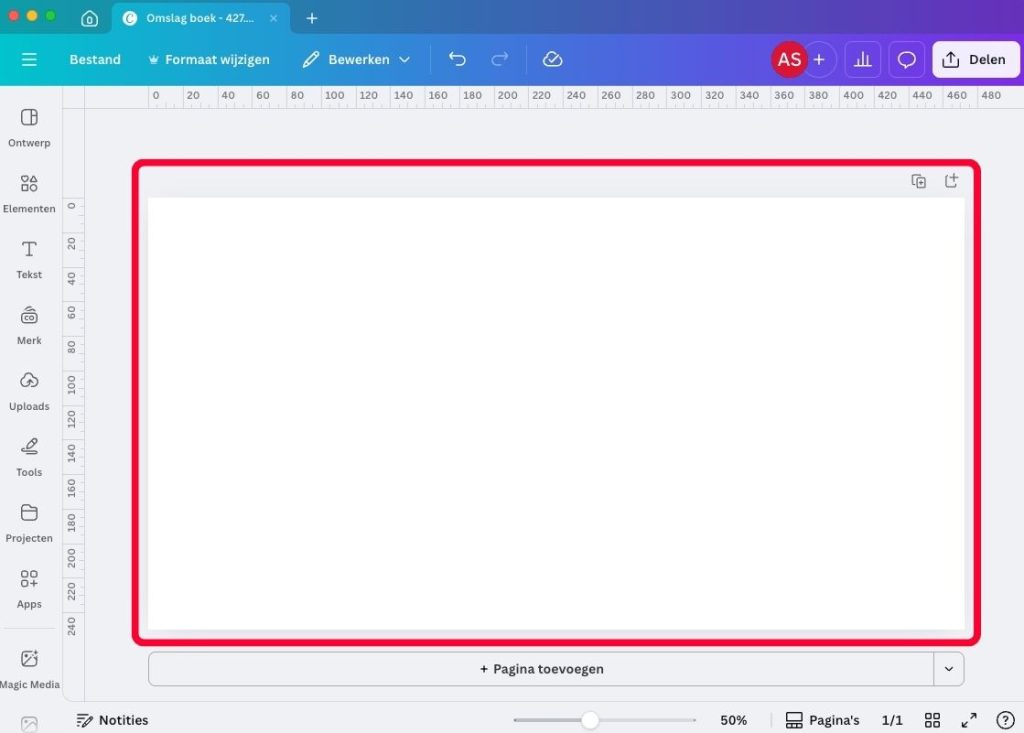
Your workspace is now precisely sized for your Bookadew cover. There are no lines visible yet, as shown in the working drawing. We will take care of this in the next step!
Image 3: entering file format in Canva
Image 4: empty Canva file (sample format)
Step 4. Setting up guide lines
Once you have created your Canva document with the correct overall size (as indicated on the Bookadew template), it is important to make the binding and spine visible using guide lines. This way, you know exactly where the front cover, back cover, spine thickness, and binding are located.
Here’s how to set it up:
At the bottom under “Rows”, enter:
- Open your newly created design in Canva (For example: 472.6 mm wide x 250 mm high, as in the example of a 210 x 210 mm hardcover with an 8.6 mm spine.)
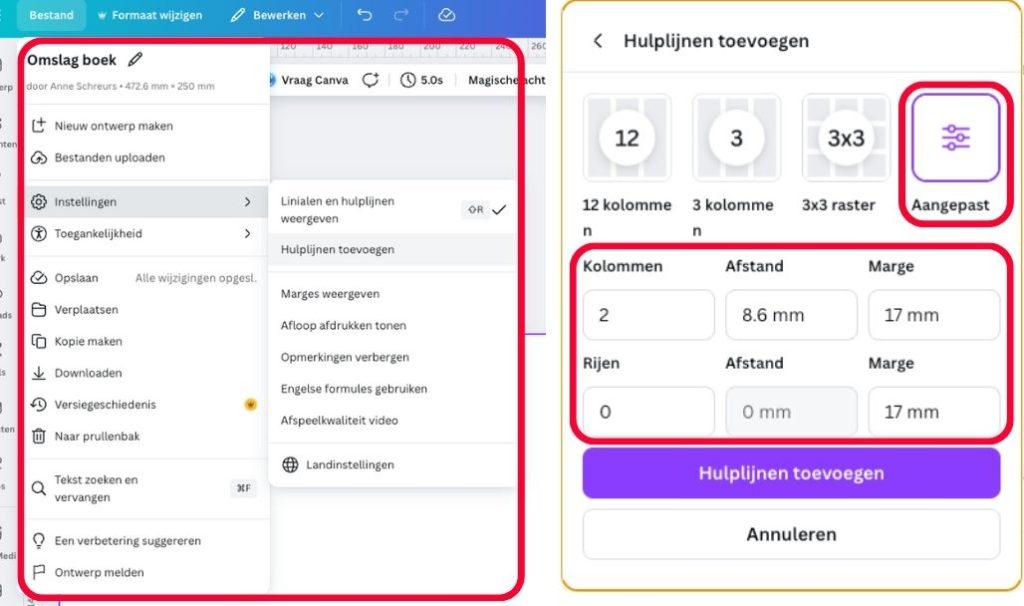
- Click File → Settings – Add guides in the top bar.
- Click on “Custom” (top right in the guidelines menu).
- Vul de instellingen als volgt in:
- Columns: 2 (this indicates that there is a back and a front).
- Spacing: enter your spine thickness here (for example 8.6 mm).
- Margin: 17 mm for hardcover (for the binding).
- Rows : 0
- Distance: 0 mm
- Margin: 17 mm
- Then click on ‘add guidelines’.
Figure 5: Adding guidelines in Canva
Figure 6: Canva file with guidelines (sample size)
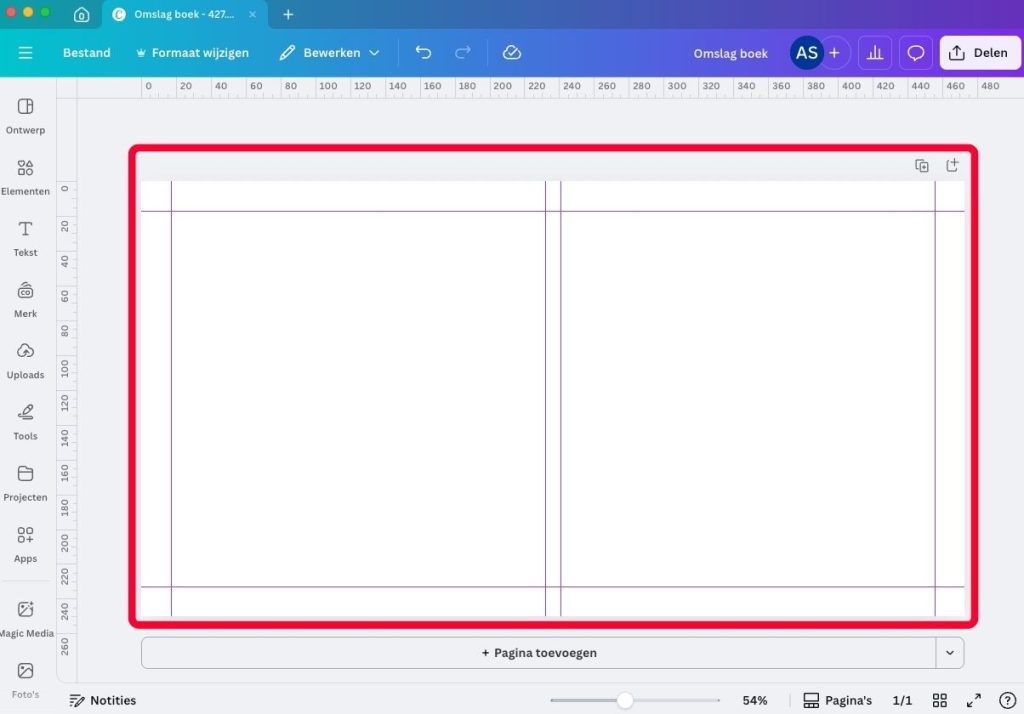
Your design plane now shows:
- A rectangular center area: this is the visible part of the cover.
- Two vertical lines in the middle: these mark the spine thickness (8.6 mm in this example).
- The 17 mm space all around: this is the wrapping edge. Always let your image extend to the outer edge.
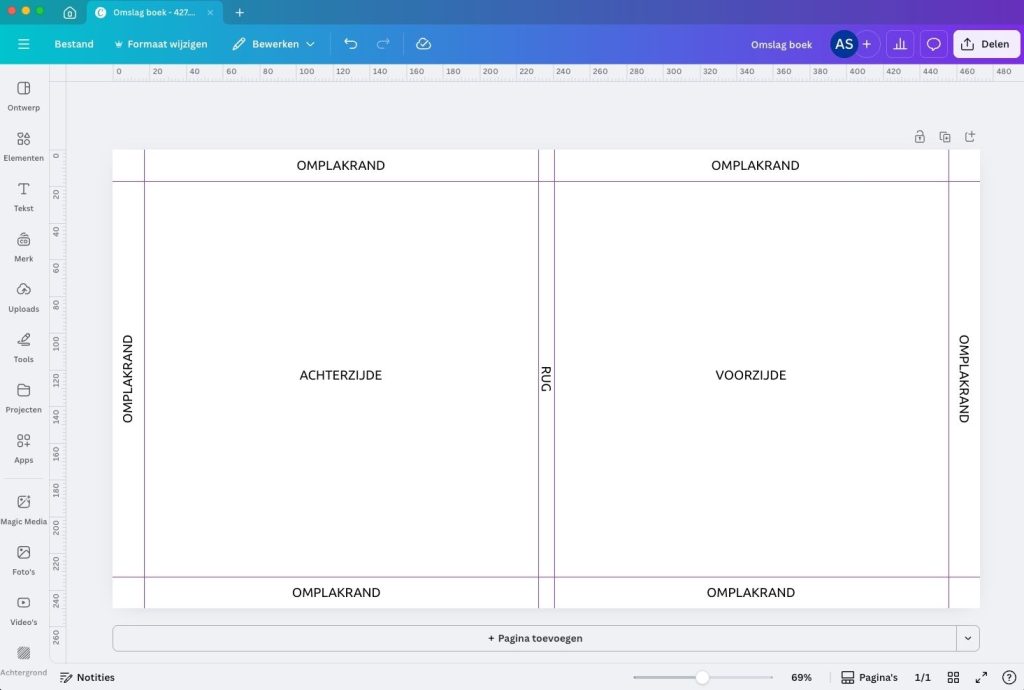
Tip: You can optionally temporarily add text such as “FRONT”, “SPINE”, “BACK”, and “PADDING EDGE” as a reminder to maintain an overview during the design process. Don’t forget to remove them at the end!
Figure 7: Canva file with helper texts (sample format)
Step 5. Design your cover
Now the creative part begins! This is, of course, entirely up to you; the information below serves partly as inspiration.
- Background: Let your color or image extend across the entire surface, including the 17 mm overlay border.
- Back: Here you can place a short summary, barcode, or logo.
- Spine: Place your title or author on the spine, vertically. Take into account the “crease” of ±9 mm next to the spine (this part curves slightly on a hardcover, see working drawing).
- Front: Place the title, name, and optionally an image or pattern. Ensure sufficient contrast and readability.
Did you know…?
The spine title of a book is always read from top to bottom, so the text is rotated 90 degrees clockwise. Pay close attention to this when placing your title in Canva, so that it doesn’t end up “upside down” on the bookshelf.
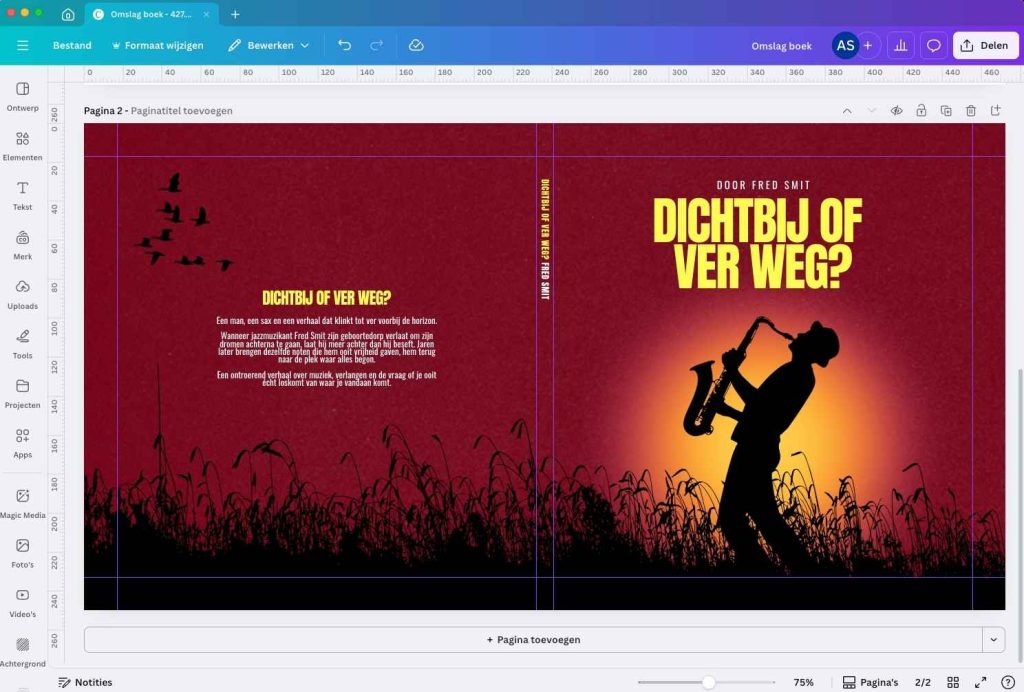
Figure 8: Example book cover in Canva
Step 6. Check your design
It is always a good idea to double-check your design! Go through all the steps again and check if everything is positioned correctly.
- Is all important text within the visible margins (i.e., not on the binding edge or in the crease)?
- Does your background image or color extend all the way to the outer edge?
- Is your spine text neatly centered?
- Has the spelling been checked?
- etc.
Step 7. Download as a print-ready PDF
- Click on ‘Share’ → ‘Download’ in the top right.
- Select PDF – Print as the file type.
- Select: CMYK color profile
- Click on ‘Download
Your file is now completely ready to submit to Bookadew! Don’t forget to include your order number in the file name.
Image 9: Download your print-ready PDF in Canva

Hopefully, you now know how to create your own hardcover book cover in Canva!
Do you have any further questions? You can always call, email, or WhatsApp us, or send us a message via our live chat. Good luck!